Remote teaching is becoming even more necessary and a lot of teachers are struggling to do it effectively.
Don’t worry!
In this guide I will explain exactly how you can teach remotely using Zoom. It’s so easy even I can do it!
You can share files and your screen with students, chat to them publicly or privately to answer their questions and give them feedback and even take the attendance register.
There are other remote teaching tools like Google Classroom and Google Hangouts Meet, but I think for video conferencing style lessons, Zoom is the best.
Wanna know how?
Thought so, let’s dive straight in.
STOP PRESS: Zoom have been removing the 40 minute meeting limit on Basic accounts to help teachers who are remote teaching due to of the Coronavirus pandemic. A
I have also two videos at the bottom of this guide. The first helps you visualize what I’ve put in this guide and the other gives students advice on how to join and use Zoom for their lessons.
Time needed: 10 minutes
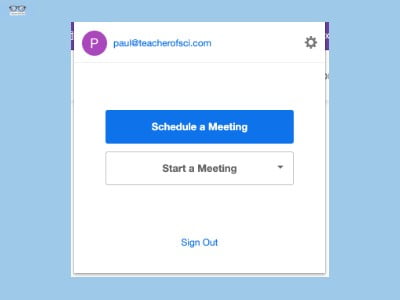
Taking Attendance and Remote Teaching Using Zoom
- Finding Zoom
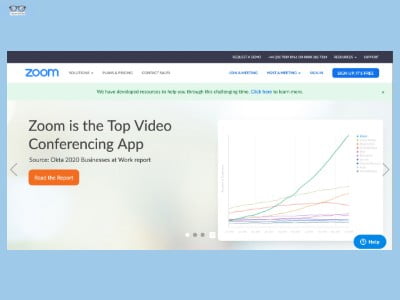
From your internet browser go to zoom.us, you can also download the app on your tablet or phone.
This guide will take you through hosting a meeting on a laptop/desktop but the process is fairly similar an any device. - Sign up to Zoom
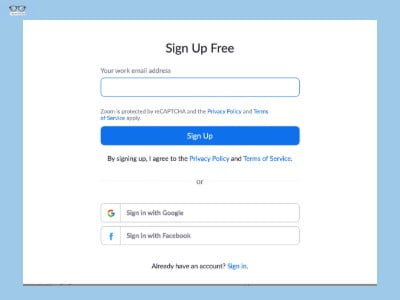
Signing up to Zoom is super easy. As with most sites now you can sign up using your Google or Facebook login details (I used the Google option in this guide). You can also sign up with your email address. - The Zoom Chrome Extension
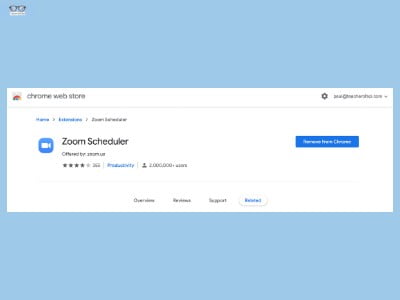
Before we dive in, I thought I’d take a little detour. Zoom has various browser extensions which make starting or scheduling a meeting even easier.
In addition to the Google Chrome extension I used, there is also a Firefox extension and an Outlook Add-in (which puts Zoom right in your Outlook side bar). - Using the Zoom Chrome Extension
Clicking on the Chrome Extension, brings up a very simple box. Self explanatory really. - Hosting a Meeting on Zoom
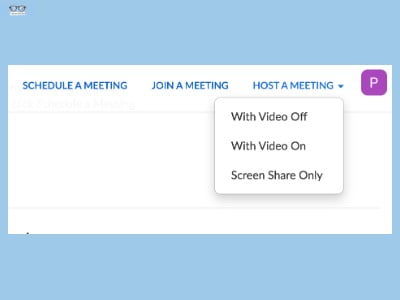
Ok, so now we dive headlong into starting a meeting. Once logged in, you will see “Host a Meeting” in the top right corner of your screen. This gives you 3 options for different types of meetings.
In this guide we go for the “With Video On” option. “With Video Off” is exactly the same but is only an audio meeting, although you can still share files and your screen.
The “Screen Share Only” is just that, no audio or video. You are just presenting your screen.
I think, as you can mute all voices, except your own. Either of the first two are probably best for teaching. - Hosting a Meeting on Zoom (2)
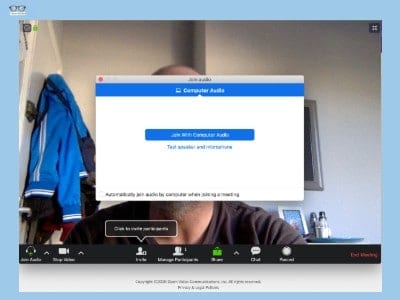
When you click the “With Video On” option you get a pop up that prompts you to “Join With Compute Audio”. This is just so you can use your computer’s internal microphone and speakers.
(in fact it will use whatever microphone and speakers your device is using, I tested it using my AirPods and a regular, wired headset. Both of which worked seamlessly).
This is by far the easiest and quickest way to get started so just click that blue button and move on! - The Zoom Main Screen
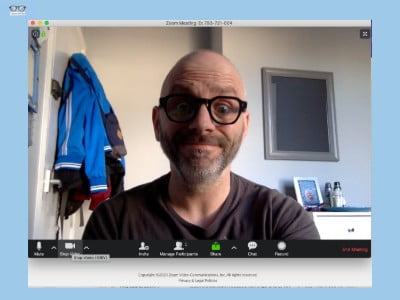
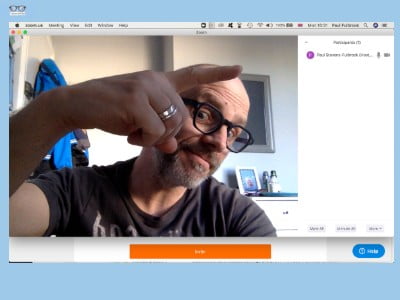
Here you see my silly face (sorry!) in the next few steps, I’ll take you through the controls and options. - Zoom Meeting Audio Options
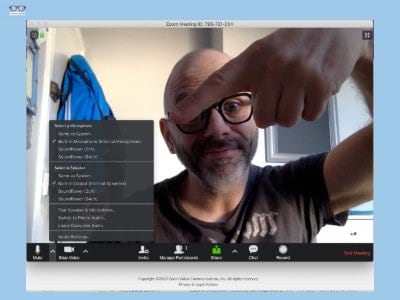
In the bottom left corner you have all the audio settings. I changed none of these but you can change the speakers and microphone and adjust the volume levels etc.
It’s there if you need it, but it works very well on the default settings. - Zoom Meeting Video Settings
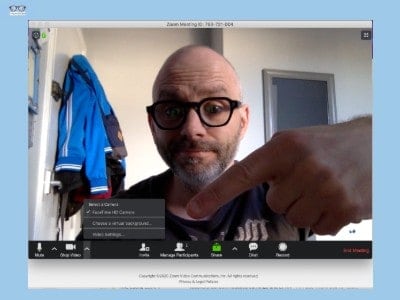
The video settings are very simple too.
You can Enable HD video, switch camera (if you have a second one) and even “Touch up my appearance”! (I tried it, it only marginally made me look more handsome…I guess it can’t work miracles!).
Again, the default options are perfectly fine. I didn’t change any of them during my tests (and subsequent classes). - Inviting People to Your Zoom Meeting
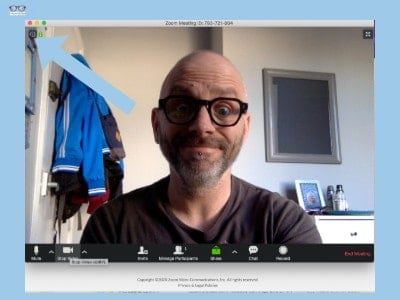
There are several ways to actually get people into the meeting (this is rather useful or you’ll just be talking to yourself…like I was).
In the top left corner there is a little exclamation mark (!). When you click on it a window pops up with all the information needed (Meeting ID, Password and Invitation URL). - Zoom Meeting Joining Information
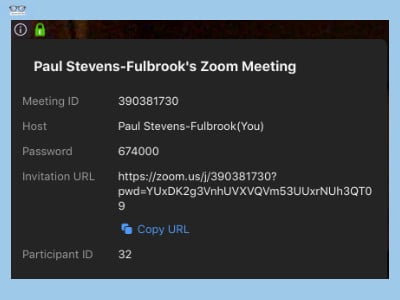
When your students or colleagues follow this link they will get to a simple log in screen, they first enter the “Meeting ID” then the password, then they are in! Easy! - Emailing the Zoom Joining Information
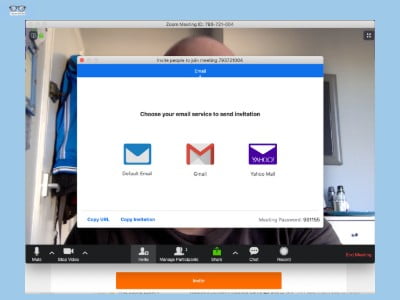
Clicking on the “Invite” Icon at the bottom of the screen (on the left of the central block of icons) brings up the window in the above picture. Just click on your preferred email option and it opens up a draft email with all the joining information already in it.
Just add the email addresses (or class name if you are using Google Classroom) and hit send! - Zoom Meeting Join Information Email

This is what the email looks like when it is received (yes, I sent one to myself…I have no friends!). - Managing Zoom Meeting Participants
Clicking the “Manage Participants” Icon at the bottom of the screen brings up the side bar panel that I am expertly pointing at.
You can mute individual people, mute everyone and rename them.
By clicking on individual participants you can chat privately with them (great for giving feedback, or answering questions students don’t feel comfortable asking in front of everyone), stop their video or remove them from the meeting. - Take Attendance and Chatting on Zoom
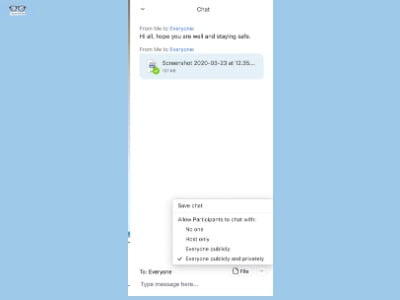
Taking attendance is very easy.
Just click the “Chat” icon at the bottom of the screen and ask something like “Are you here?” everyone replies and hey presto, the attendance register is taken.
You can then save the chat by clicking the three dots icon at the bottom of the chat window. Excellent for your records!
As stated in the previous step, you can chat privately with anyone in the meeting or chat to everyone.
You can even limit participants to be able to chat to no one, the host, everyone publicly or everyone publicly and privately. - Multiple Video Screens in a Zoom Meeting
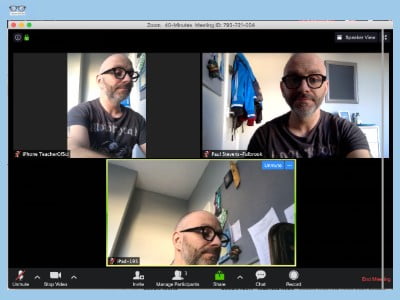
With three participants, this is what you will able to see. Depending on how many participants you have the screens will get smaller. You can also change the way it displays the videos. I used three devices here, me and my two best friends! - Sharing Your Screen with Participants on Zoom (Basic)
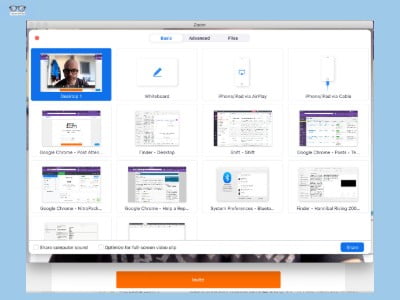
Clicking the “Share” icon at the bottom of the main meeting screen brings up the above window.
There are three options at the top (Basic, Advanced and Files). The view in this Picture is the “Basic” option. It displays all the windows you have open on your computer which you can then select and hit share (bottom right blue button).
All Participants will then be able to see anything you do on that screen. Limitless possibilities! - Sharing Your Screen with Participants on Zoom (Advanced)
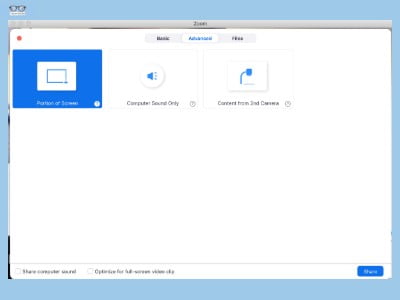
The “Advanced” screen share option gives you three choices.
Show portion of screen. This allows brings up a frame which you can drag around your screen and only show portions you want students to see. I use this to show students questions, leaving the answers covered until I’m ready to reveal them.
Computer Sound Only. This option doesn’t show anything visually but the sounds that are playing from your computer. Very handy.
Content from second camera. If you have a second camera, like a visualizer or one hooked up to a microscope (this is what I’ve done, its brilliant). you can use this to share the content from that camera.
I have showed students things under a microscope and even showed them what it looks like when you get things into focus, talking them through what I’m doing. - File Sharing in a Zoom Meeting
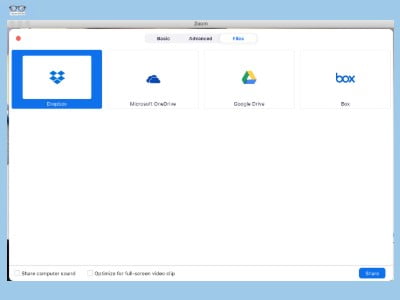
The last option allows you to share files from most of the most popular cloud drives (Dropbox, Google Drive, Microsoft OneDrive and Box). Participants can’t edit the files you are sharing but they can see what you are doing with them.
Conclusion
Zoom is incredibly easy to use and very versatile. If you are struggling to teach remotely or your current method isn’t working too well, you should try Zoom.
It really is fantastic!
If you have any other great Zoom tips or ideas, please comment below so we can all benefit from them.